ZAPTEST WebDriver Quick Start Guide and Overview
(applies to ZAPTEST v22.4.0 or later)
A lot of useful information can be found in the official Selenium Documentation. It can be particularly useful for better understanding the capabilities of WebDriver.
The main idea behind Selenium WebDriver is to provide standardized access and control of web browsers. This means that Selenium defines a common API, and each browser vendor aims to support it in their product.
Environment Configuration
Before you start using WebDriver, you need to configure the System Environment. There are two ways to do this.
- Auto(default)
By default, if the path to the WebDriver folder or the Environment variable is not specified, ZAPTEST will try to automatically detect and download the appropriate WebDriver file for the browser specified in the ‘Zap.WebDriver.Init(browser) method’. The downloaded file will be stored in the cache and used by ZAPTEST. - Manual
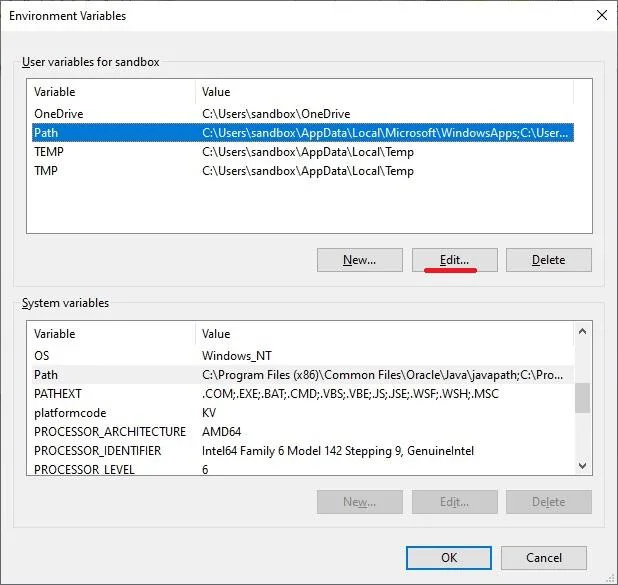
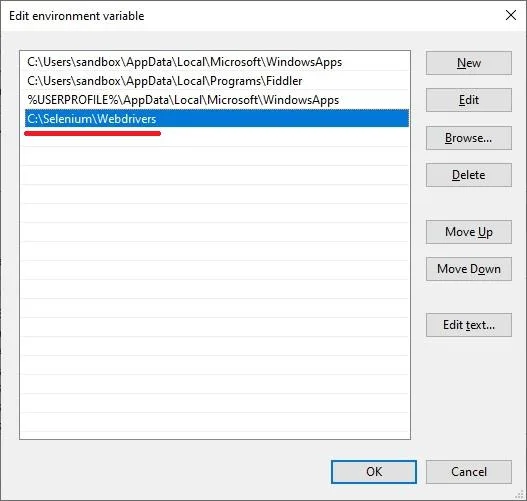
Users can manually download WebDriver files for various browsers. The files need to be stored in a common folder, which must be included in ZAPTEST Options. Alternatively, users can configure the Windows Environment Path Variable. If ZAPTEST is unable to find an appropriate driver, it will attempt to obtain it automatically.Here are the links to download the required WebDriver files for different browsers:
- Chrome WebDriver: (https://chromedriver.chromium.org/downloads)
- Firefox WebDriver: (https://github.com/mozilla/geckodriver/releases)
- Edge WebDriver: (https://developer.microsoft.com/en-us/microsoft-edge/tools/webdriver/)
- Opera WebDriver: (https://github.com/operasoftware/operachromiumdriver/releases)
Please download the required WebDriver files, unzip if necessary, and copy the executable file(s) to a special folder.
The WebDriver must match the browser version. If a browser is updated, its WebDriver also needs to be updated.
Next, you need to configure the path to the WebDriver location; you have two options:
- Include the path to the WebDriver folder in the System Environment Variable Path.


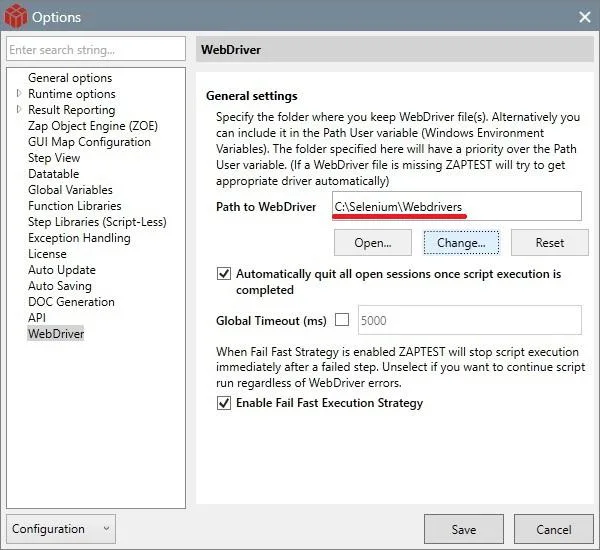
- Include the path to the WebDriver folder in ZAPTEST Options.

ZAPTEST WebDriver Options
On the Options page, you can find a few additional WebDriver configurations.
- Automatically quit all open sessions once script execution is completed
When this setting is enabled, ZAPTEST will automatically close all open WebDriver sessions once a script execution is completed. It’s up to you to control the lifecycle of each WebDriver session. You can call the ‘Quit’ method when it’s required:Zap.WebDriver("session_name").Quit();In most cases, ZAPTEST can handle this by itself and close the WebDriver session for you. However, if for some reason you want to have full control over the session cycle, you can disable this option.
- Global Timeout (ms)
Some operations may require specific timeouts to limit the wait time to get the result, especially on dynamic pages, etc. By default, ZAPTEST runs WebDriver operations without a timeout. You can include a timeout argument for a specific operation. For example, the following FindElement step will use a 5-second timeout:Zap.WebDriver("session_name").FindElement.ById("id", 5).Click();Alternatively, you can enable the Global Timeout, and ZAPTEST will use it in all steps where it is not explicitly specified as an argument.
- Enable Fail Fast Execution Strategy
When the Fail Fast Strategy is enabled, ZAPTEST will stop script execution immediately after a failed step. If you want to continue your script run after a WebDriver error, unselect this option.
Quick Start and Code Examples
In this section, we will cover the basic operations and methods of ZAPTEST WebDriver.
All WebDriver-related methods are in the Zap.WebDriver namespace.
Zap.WebDriver
‘Zap.WebDriver’ is not just a pure namespace; it’s a method that has one optional argument – the session name.
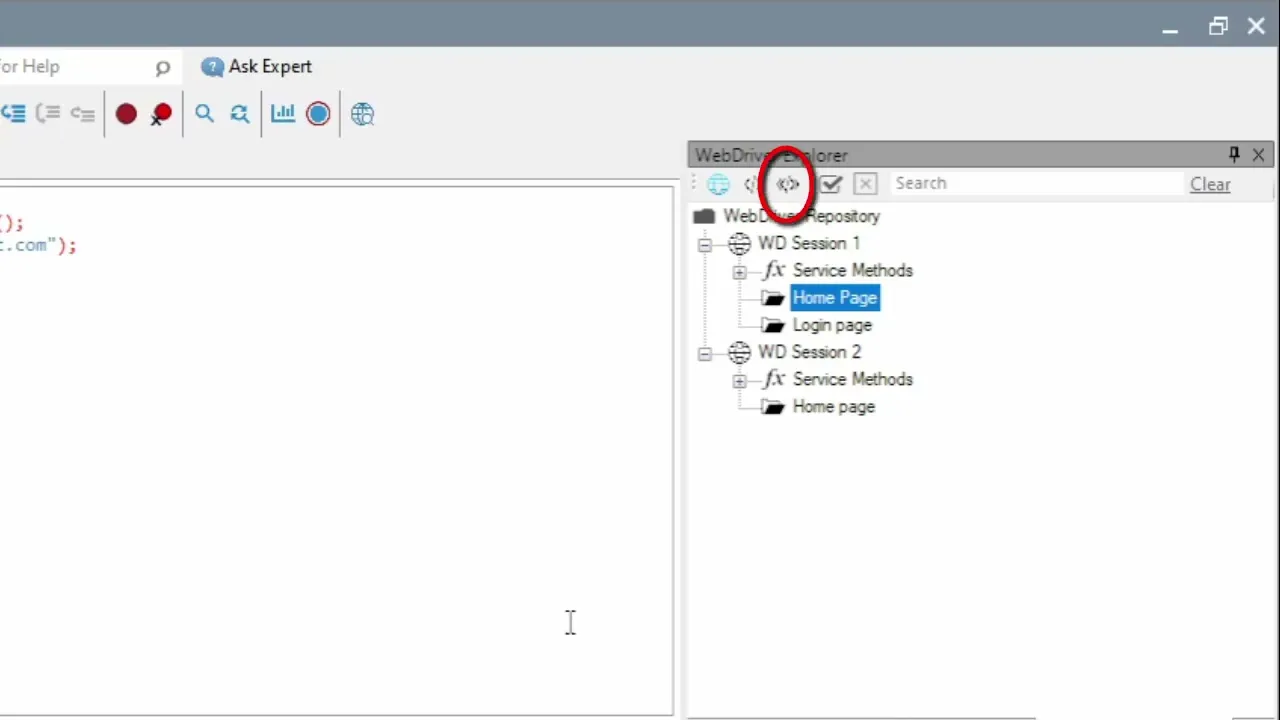
Zap.WebDriver("main session")...
This method allows you to create multiple concurrent sessions, which means you can open a number of browsers simultaneously. If you omit the session name argument, the session with the name “default” is used.
WebDriver sessions are global, which means that when you run an external script via ‘Zap.Runtest’, the external script can access the WebDriver sessions. This provides you with the ability to create modules that can perform initialization steps or common operations within a specific WebDriver session. For instance, you can have a Login script that takes a session name as an argument, and it will perform login steps in that particular web session.
Zap.WebDriver(“session name”).Init(“chrome”)
This is the first operation you need to perform before any other WebDriver operation. It involves instantiating a new WebDriver connection with the specified browser as an argument.
If you omit the argument, Chrome browser will be used as the default option.
IMPORTANT: When using WebDriver in combination with ZOE objects, the WebDriver must be responsible for opening the browser. The ZOE object for the application should be configured to find the browser window. Avoid using ‘Application(“name”).Launch()’ with the WebDriver in such cases.
Zap.WebDriver(“session name”).Navigate
This namespace contains navigation methods.
- GoToUrl
This method opens the specified address in the browser session. It is usually the next command after the ‘Init‘ step.
Zap.WebDriver("session_name").Navigate.GoToUrl("https://zaptest.com");
- Back, Forward, Refresh
These methods provide standard operations for browser navigation. You can use them to navigate backward, forward, or refresh the current page in the browser session.
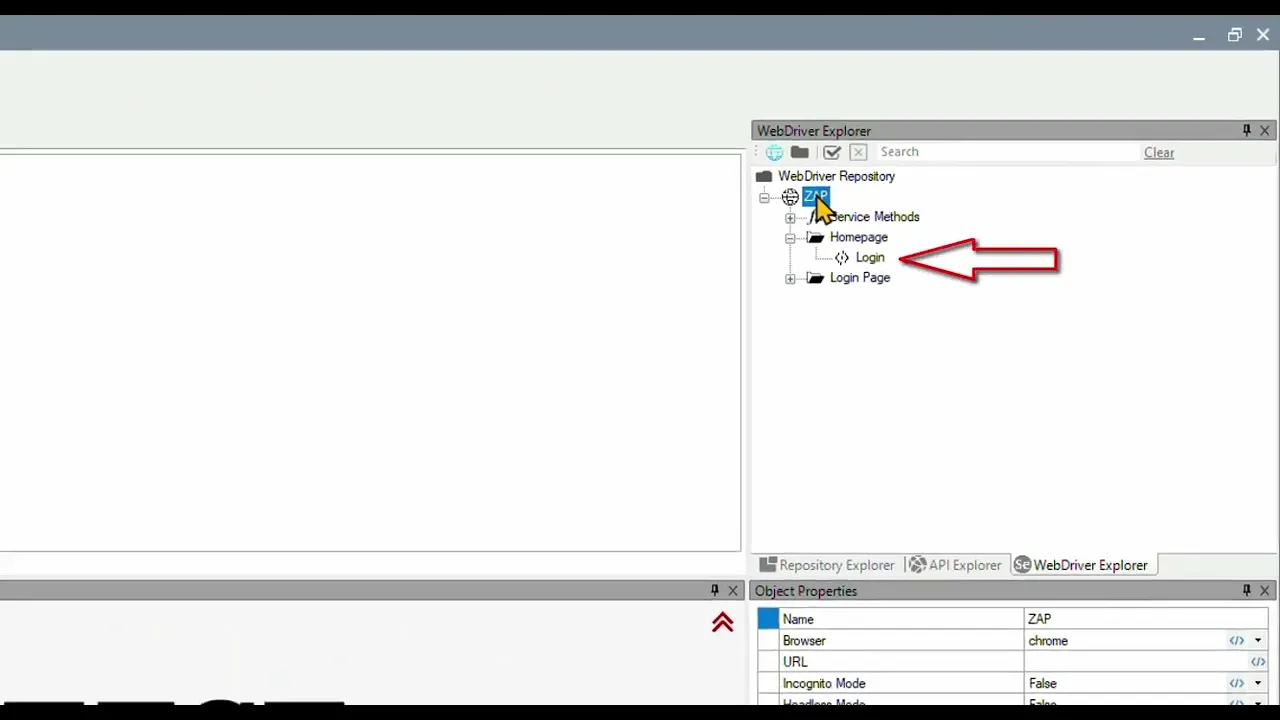
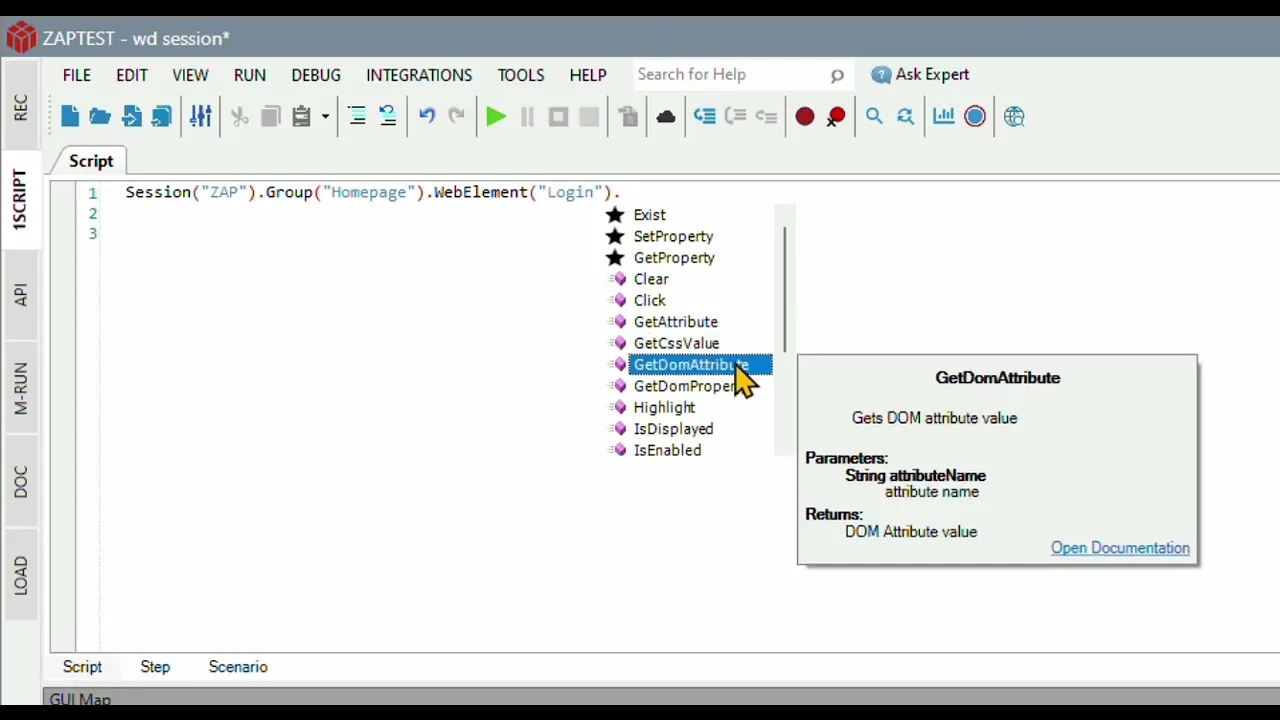
Zap.WebDriver(“session name”).FindElement
This method is used to find a web element in the page DOM. It returns a web element object. To find the element, you need to specify which kind of locator to use:
- ByTagName(string tag)
- ByCssSelector(string cssSelector)
- ById(string id)
- ByLinkText(string text)
- ByName(string name)
- ByPartialLinkText(string name)
- ByTagName(string tag)
- ByXPath(string xPath)
For more information about using locators, you can visit: (https://www.selenium.dev/documentation/webdriver/elements/locators/) In this example, we use the ‘Exist’ method to verify whether the element was found:
Zap.WebDriver("session name").FindElement.ById("id").Exist();
Zap.WebDriver(“session name”).FindElements
This method returns a collection of Web Elements that satisfy the provided criteria (locator).
To work with a collection, the WebDriver provides 2 methods:
- Count
This method returns the number of elements in the collection:
numberOfElements = Zap.WebDriver("session name").FindElements.ByTagName("a").Count();
- Item(int index)
This method returns an element from the collection based on the zero-based index. For example, to click on the 4th element in the collection of “a” tags:
Zap.WebDriver("session name").FindElements.ByTagName("a").Item(3).Click();
For more information about Interacting with web elements, you can visit: (https://www.selenium.dev/documentation/webdriver/elements/interactions/)
For specific information about web elements, you can visit: (https://www.selenium.dev/documentation/webdriver/elements/information/)
Zap.WebDriver namespace overview
Below is a quick overview of the WebDriver namespaces in ZAPTEST:
- Zap.WebDriver namespace
This namespace contains basic operations with the web driver session, such as Init, Close, MakeScreenShot, and more. - FindElement and FindElements
These namespaces are used to find DOM elements on the page. ‘FindElement’ returns a single web element, while ‘FindElements’ returns a collection of web elements. Different sets of interaction methods are available for web elements. - JavaScript
The JavaScript namespace allows you to execute simple JavaScript code in the browser and return the result. - Manage
The Manage namespace provides access to Cookies, Local Storage, and Session Storage. It also allows you to Minimize/Maximize the browser window or control Web Driver-specific timeouts. - Navigate
The Navigate namespace offers methods for browser navigation, including opening URLs, going back and forward, and refreshing the page. - Options
The Options namespace contains methods that allow you to configure the web driver session. For example, you can run the session in headless mode. It’s important to execute these methods before calling the ‘Init’ method.
Simple Script Code Example
Please note that this is a pseudo-code and not actual executable code. This script demonstrates the basic operations and interactions that can be performed using ZAPTEST WebDriver. In this simple script, we initiate a new WebDriver session using Chrome, navigate to a web application, interact with various elements (clicking on buttons, checking the existence of elements, entering login credentials), and finally, we explicitly close the session.
//initialize new session
Zap.WebDriver("session 1").Init("chrome");

//navigate to web application
Zap.WebDriver("session 1").Navigate.GoToUrl("https://test_site.com");

//click on login button with wait timeout of 5 seconds
Zap.WebDriver("session 1").FindElement.ById("loginID", 5).Click();

//check that new page contains Welcome Message
Zap.WebDriver("session 1").FindElement.ById("welcomeID").Exist();

//enter login and password and click on login button
Zap.WebDriver("session 1").FindElement.ById("username").SendKeys("TestUser");
Zap.WebDriver("session 1").FindElement.ById("password").SendKeys("test123");
Zap.WebDriver("session 1").FindElement.ById("loginButtonID", 5).Click();

//check that logged in message element exist
Zap.WebDriver("session 1").FindElement.ById("LoggedInID").Exist();

//now we can explicitly close the session before exit the script
Zap.WebDriver("session 1").Quit();